CARA INSTALL OPENCV dan PYTHON DI UBUNTU V.16.04
WORK!!!
Halo selamat malam jomblo yang lagi ngelab di lab perjuangan yang kemungkinan cewek cantik gak bakal lewat, hahahahaha
yuk langsung aja kita coba install opencv 3.0 dan python 2.7 di ubuntu v.16.04
-> step 1
$ sudo apt-get update
$ sudo apt-get upgrade
-> step 2
$ sudo apt-get install build-essential cmake pkg-config
-> step 3
$ sudo apt-get install libjpeg8-dev libtiff5-dev libjasper-dev libpng12-dev
-> step 4
$ sudo apt-get install libavcodec-dev libavformat-dev libswscale-dev libv4l-dev
$ sudo apt-get install libxvidcore-dev libx264-dev
-> step 5
$ sudo apt-get install libgtk-3-dev
$ sudo apt-get install libatlas-base-dev gfortran
$ sudo apt-get install python2.7-dev
-> step 6
$ cd ~
$ wget -O opencv.zip https://github.com/Itseez/opencv/archive/3.1.0.zip
$ unzip opencv.zip
-> step 7
$ wget -O opencv_contrib.zip https://github.com/Itseez/opencv_contrib/archive/3.1.0.zip
$ unzip opencv_contrib.zip
-> step 8
$ cd ~
$ wget https://bootstrap.pypa.io/get-pip.py
$ sudo python get-pip.py
-> step 9
$ sudo pip install virtualenv virtualenvwrapper
$ sudo rm -rf ~/get-pip.py ~/.cache/pip
-> step 10
tambahkan tulisan dibawah ini ke file bashrc, kemudian gedit file bashrcnya, jika kurang jelas silahkan comment di bawah,
tambahan text:
# virtualenv and virtualenvwrapper
export WORKON_HOME=$HOME/.virtualenvs
source /usr/local/bin/virtualenvwrapper.sh
$ echo -e "\n# virtualenv and virtualenvwrapper" >> ~/.bashrc
$ echo "export WORKON_HOME=$HOME/.virtualenvs" >> ~/.bashrc
$ echo "source /usr/local/bin/virtualenvwrapper.sh" >> ~/.bashrc
-> step 12
-> step 16
$ workon cv
biarkan masuk dulu ke mode kerja opencv, kemudian ketikkan teks dibawah ini :
$ cd ~/opencv-3.1.0/
$ mkdir build
$ cd build
$ cmake -D CMAKE_BUILD_TYPE=RELEASE \
-D CMAKE_INSTALL_PREFIX=/usr/local \
-D INSTALL_PYTHON_EXAMPLES=ON \
-D INSTALL_C_EXAMPLES=OFF \
-D OPENCV_EXTRA_MODULES_PATH=~/opencv_contrib-3.1.0/modules \
-D PYTHON_EXECUTABLE=~/.virtualenvs/cv/bin/python \
-D BUILD_EXAMPLES=ON ..
kemudian masih di mode kerja workon, ketikkan teks dibawah ini:
$ make -j4
$ make clean
$ make
$ sudo make install
$ sudo ldconfig
-> step 17
setelah semua selesai pastikan dengan mengetikkan teks dibawah ini :
$ ls -l /usr/local/lib/python2.7/site-packages/
maka akan keluar tulisan :
total 1972
-rw-r--r-- 1 root staff 2016608 Sep 15 09:11 cv2.so
-> step 18
$ cd ~/.virtualenvs/cv/lib/python2.7/site-packages/
$ ln -s /usr/local/lib/python2.7/site-packages/cv2.so cv2.so
-> step 19
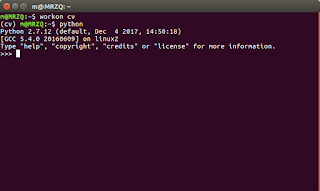
cek apakah python dan opencv terinstall :
Jika ada pertanyaan dan masalah silahkan comment dibawah ini ya jomblo, wkwkwkwk


